Getting started with the 3018 CNC Engraving Machine
0. The 3018 CNC
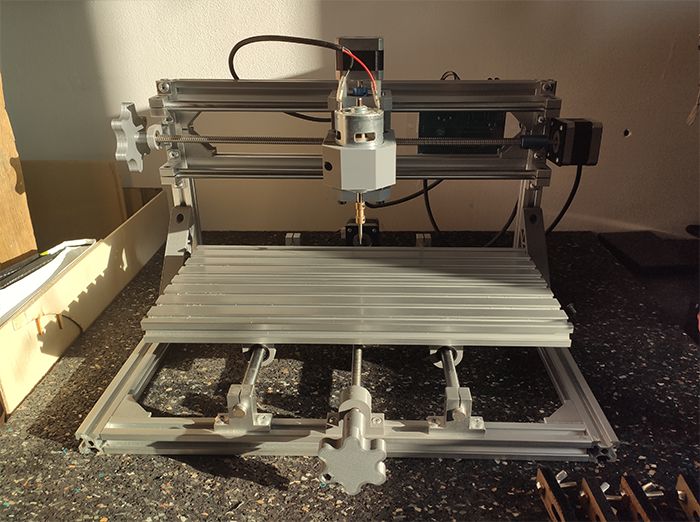
The 3018 CNC is a low cost miiling mavhine that I bought for 119€ on discount a few months ago.
| Specification table | - |
|---|---|
| Model | Mini CNC3018 (Without laser module) |
| Frame material | Aluminum |
| Power supply | DC 24V 5.6A |
| Work area | Approx. 300x180x40mm |
| Machine Size | Approx. 400x330x240mm |
| Control software | GRBL |
| Stepper motor | 42 stepper motors, voltage: 12V, phase current 1.3A, torque 0.25Nm |
| Spindle motor | 775 spindle motor (12-36V) 24V: 7000r / min, 36V: 9000r / min |
| Net weight | 7.5KG |
| - | - |
| Engraving materials | The machine can carve wood, plastic, acrylic, PCB or similar materials. |
| Cannot engrave | hard metal (such as brass, steel, iron, etc.), jade and other very hard texture items. |
1. Parts of the machine to improve
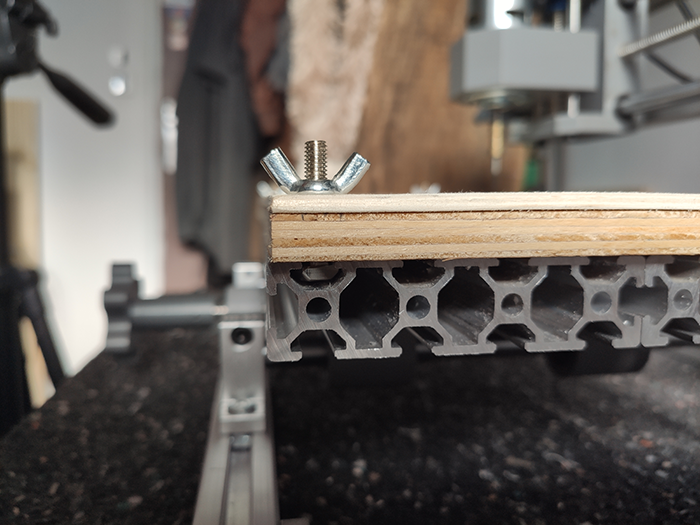
CNC Tray
A major issue I met using this CNC and its original accessories was the difficulty to efficiently attach a piece to engrave on the tray. The clamp system delivered with the machine doesn't stay in place with the vibrations produced when it is turned on. To solve that issue, Romain advised me to attach a martyr board on the aluminium tray. I used a board with approximatively the same size as the cnc tray and attached it by making holes and using the cnc screws system. I added a 3mm poplar plank to use as my engraving test board, which is attached using the same system as the martyr board.
Spindle motor
[to come]
Ressource : https://www.youtube.com/watch?v=_qTjYUyNpGs
End-stop switches
[to come]
Ressource : http://blog.shahada.abubakar.net/post/adding-end-stops-limit-switches-to-the-3018-woodpecker-cnc-router
Emergency stop
[to come]
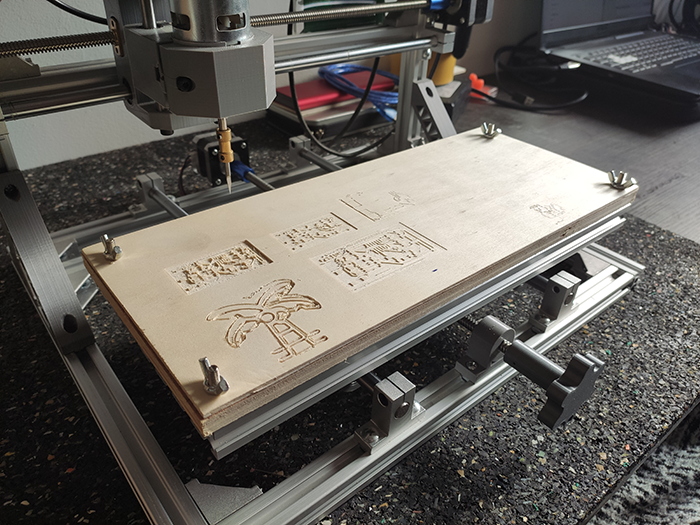
2. Milling tests
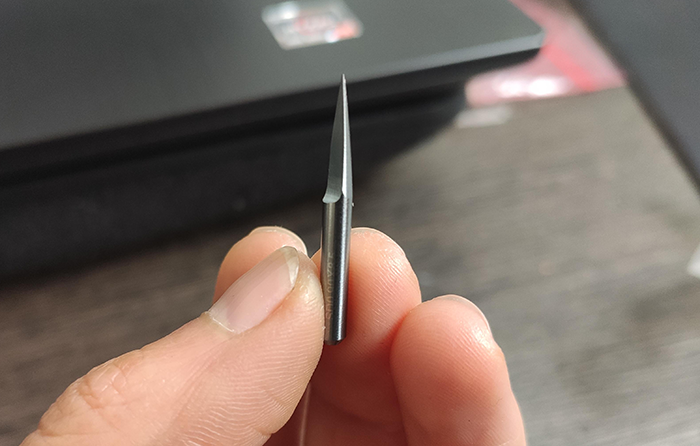
Drill Bits
- 3.175mm diameter
- 0.1mm tip
- 20° angle
Easel
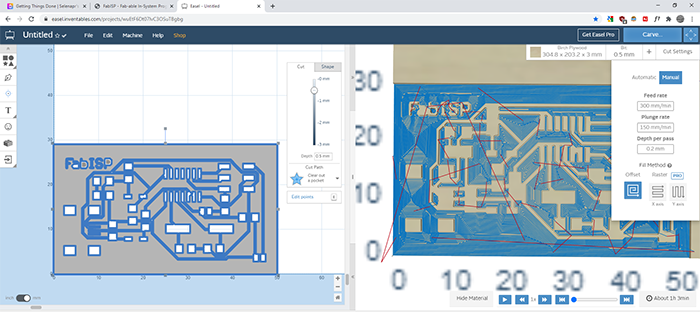
I used Easel, an online gcode generator : https://easel.inventables.com/.
GRBL Control
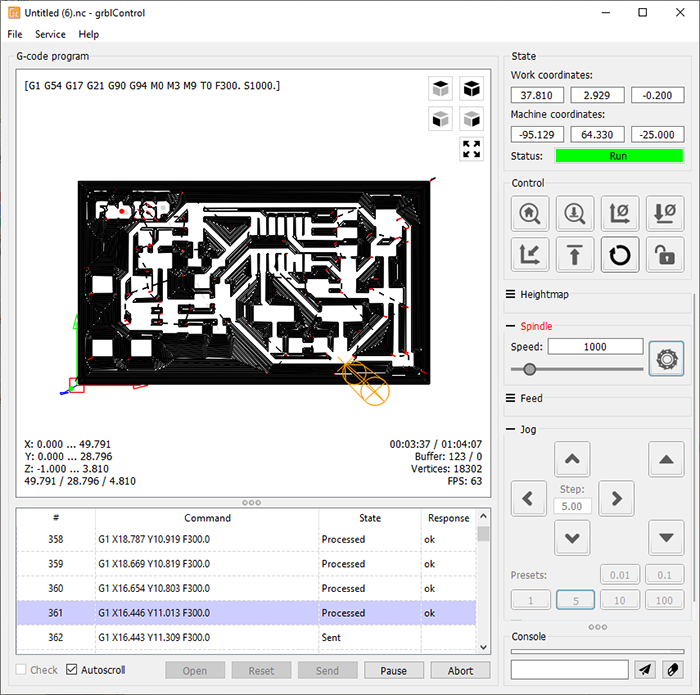
Calibrate X, Y, and Z origins.
Import .gcode file.
Send the instructions.
Stay alert.
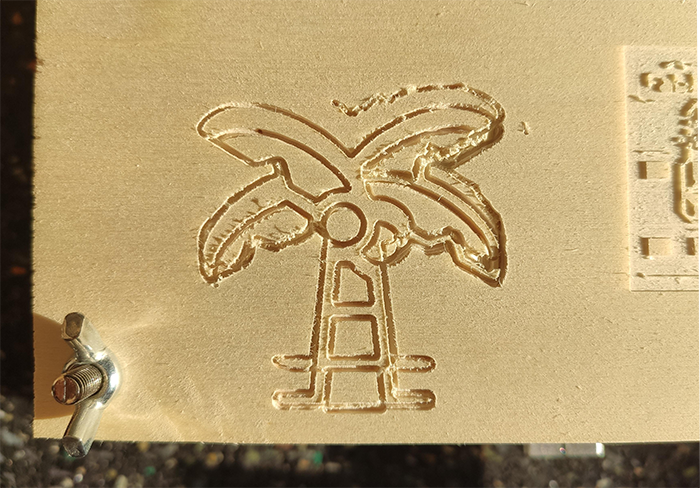
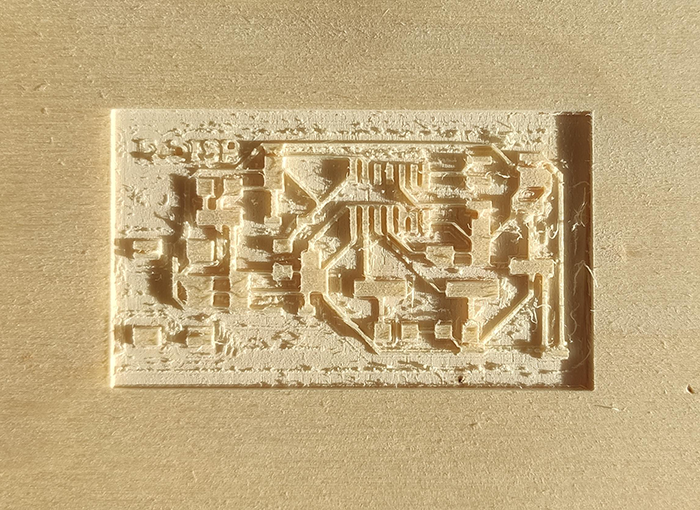
Milling tests
| Picture Test | Bit size | Depth | Depth per pass | Feed rate | Plunge Rate | Spindle Speed | Issue encountered |
|---|---|---|---|---|---|---|---|
 |
1 mm | 1 mm | 0.2 mm | 350 mm/min | 150 mm/min | 7000r/min | The Y axis wasn't tighten enough |
 |
0.5 mm | 0.2 mm | 0.2 mm | 300 mm/min | 150 mm/min | 7000r/min | - |
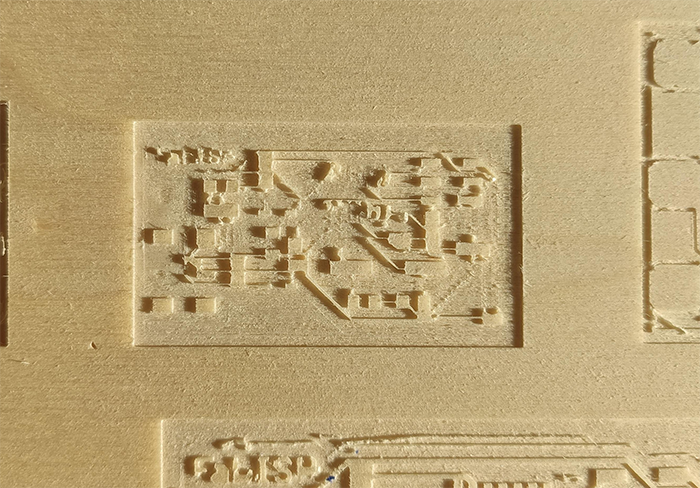 |
0.5 mm | 0.2 mm | 0.1 mm | 300 mm/min | 150 mm/min | 7000r/min | - |
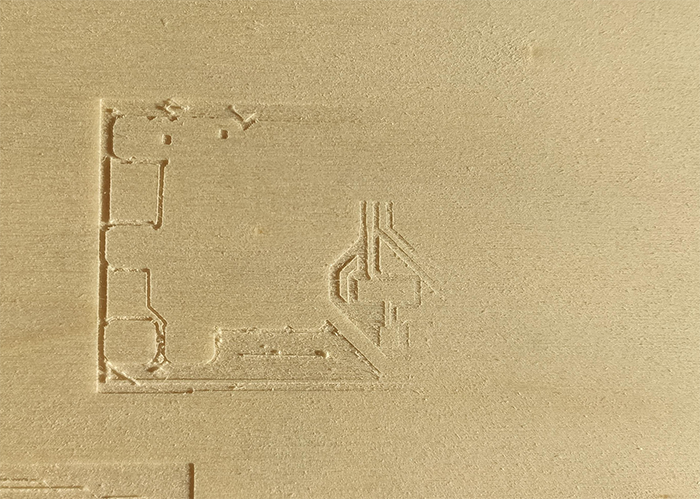 |
0.3 mm | 0.5 mm | 0.2 mm | 300 mm/min | 150 mm/min | 7000r/min | the engraving board wasn't plane at this location, it was milling in the air. |
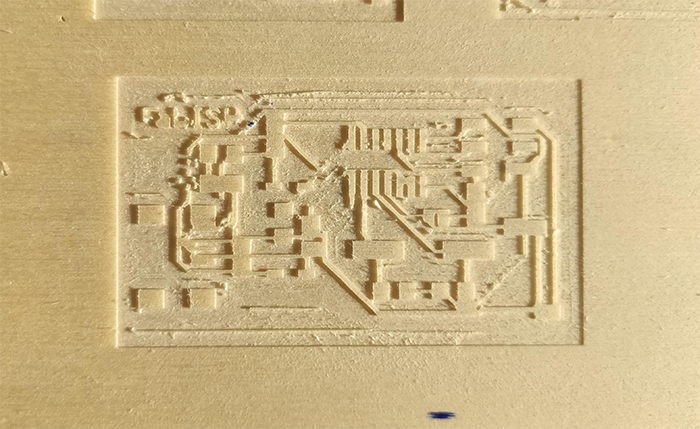 |
0.3 mm | 0.5 mm | 0.2 mm | 300 mm/min | 150 mm/min | 7000r/min | - |
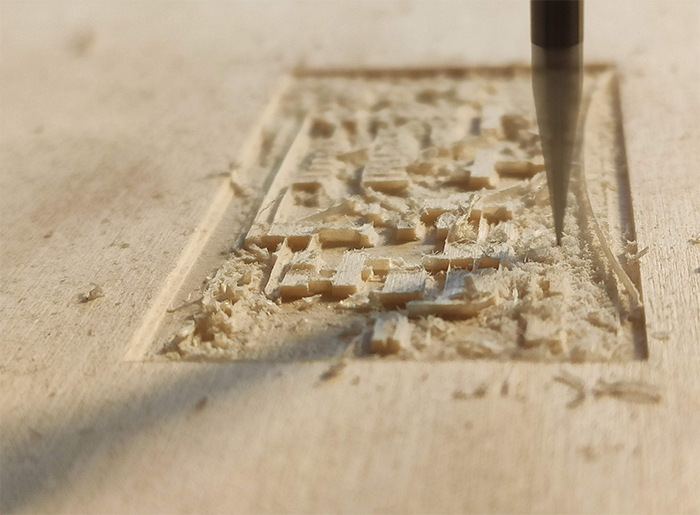
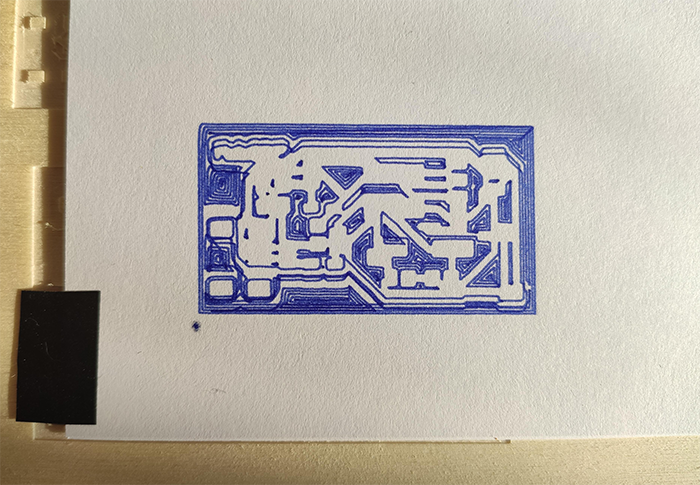
Bonus pictures :

3. Drawing tests
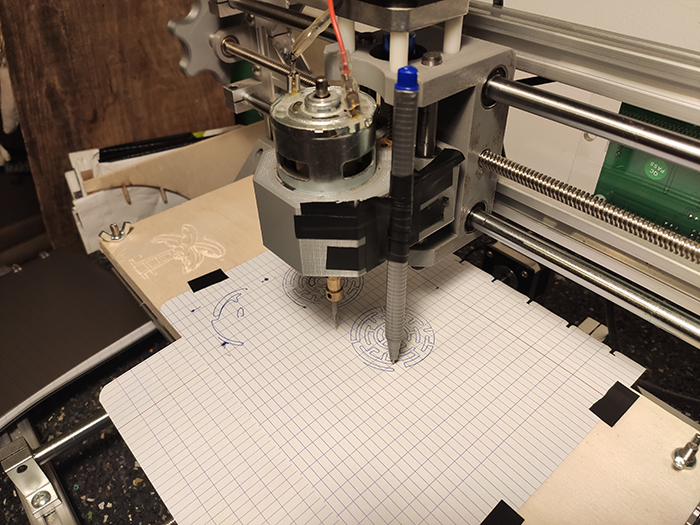
Test set up
It was late, and the spindle motor producing too much noise I couldn't use it, so I attached a pen using adhesive chatterton.

Easel
The parameters used are slighty the same as with the milling bit, the pen size is 0.3mm, but the speed has been reduced to 250mm/min.
GRBL Control
The pen is calibrated the same way as with the milling bit, but I added 0.2mm to the Z origin so that the tip of the pen does not get damaged.
Drawing tests
| Picture test | Pen size | Depth | Depth per pass | Feed rate | Plunge Rate | Spindle Speed | Issue encountered |
|---|---|---|---|---|---|---|---|
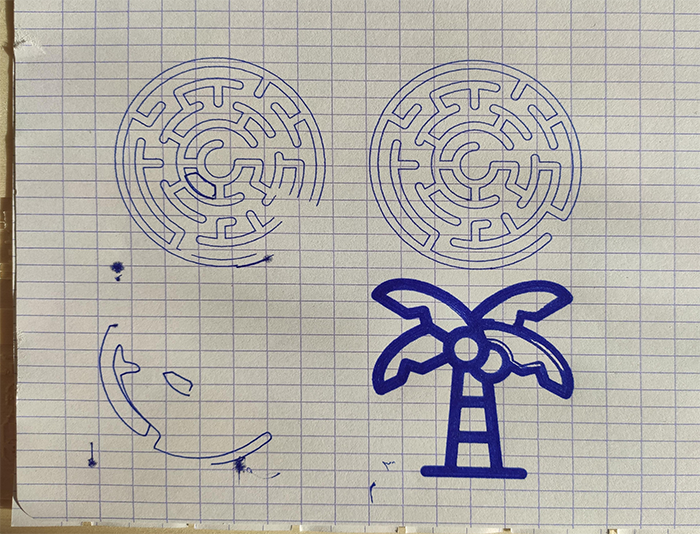 |
0.3 mm | 0.1 mm | 0.1 mm | 250 mm/min | 150 mm/min | - | The chatterton is not enough to tightely attach the pen, the result can't be precise. |
 |
0.3 mm | 0.1 mm | 0.1 mm | 250 mm/min | 150 mm/min | - | The chatterton is not enough to tightely attach the pen, the result can't be precise. |
For more accurate result with the drawing test, I should 3D print a part, the pen would be attached tightely enough, and the result more precise.